This guide shows step by step how to create color variations in WooCommerce using the YITH WooCommerce Color and Label Variations extension. This is the first step to setting up product variants with color choices in your online store. You can also use images, icons and text labels instead of colors – depending on what you need!
This guide requires that you have the extension installed and activated before getting started.
To start, we first make attributes ready so that we can select them as variants in the products afterwards.
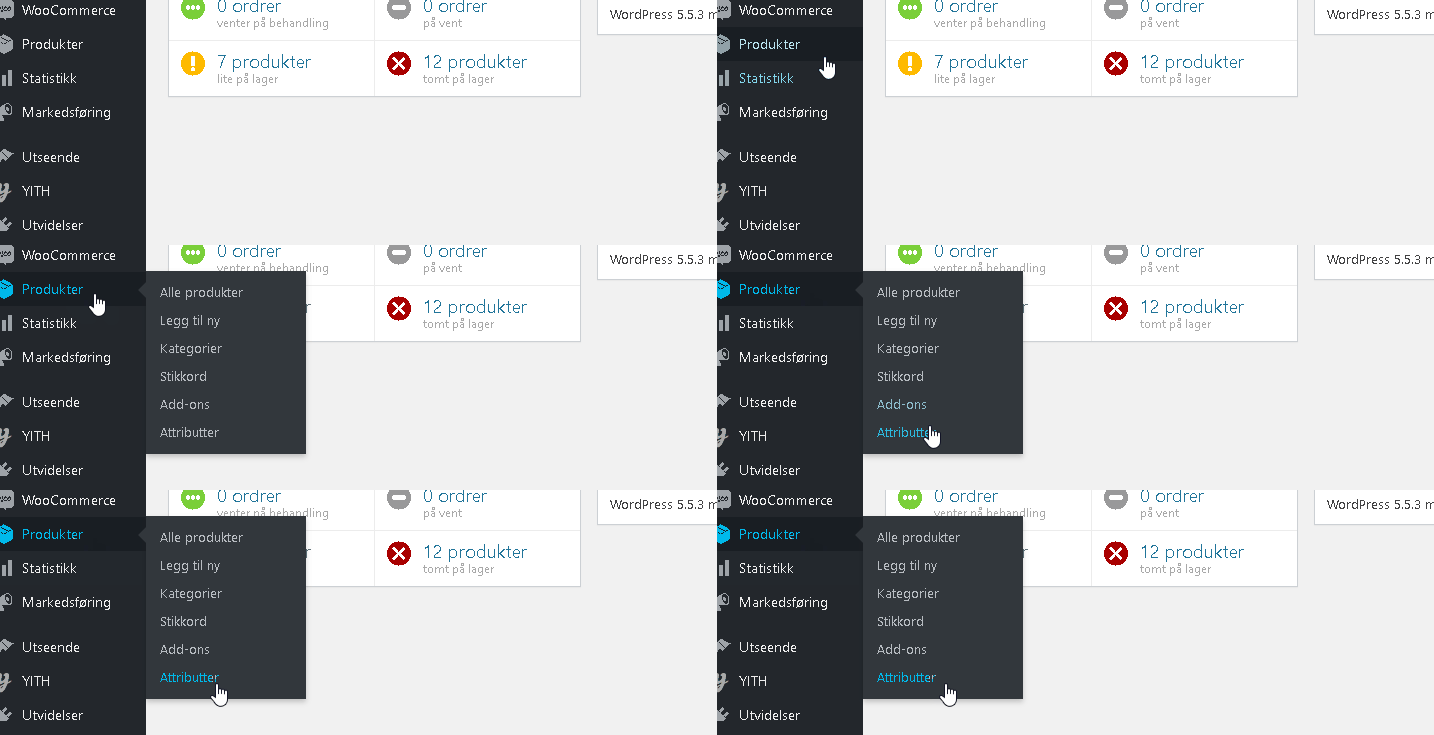
Step 1 – Open Attributes (mouse over “Products” inside WordPress)

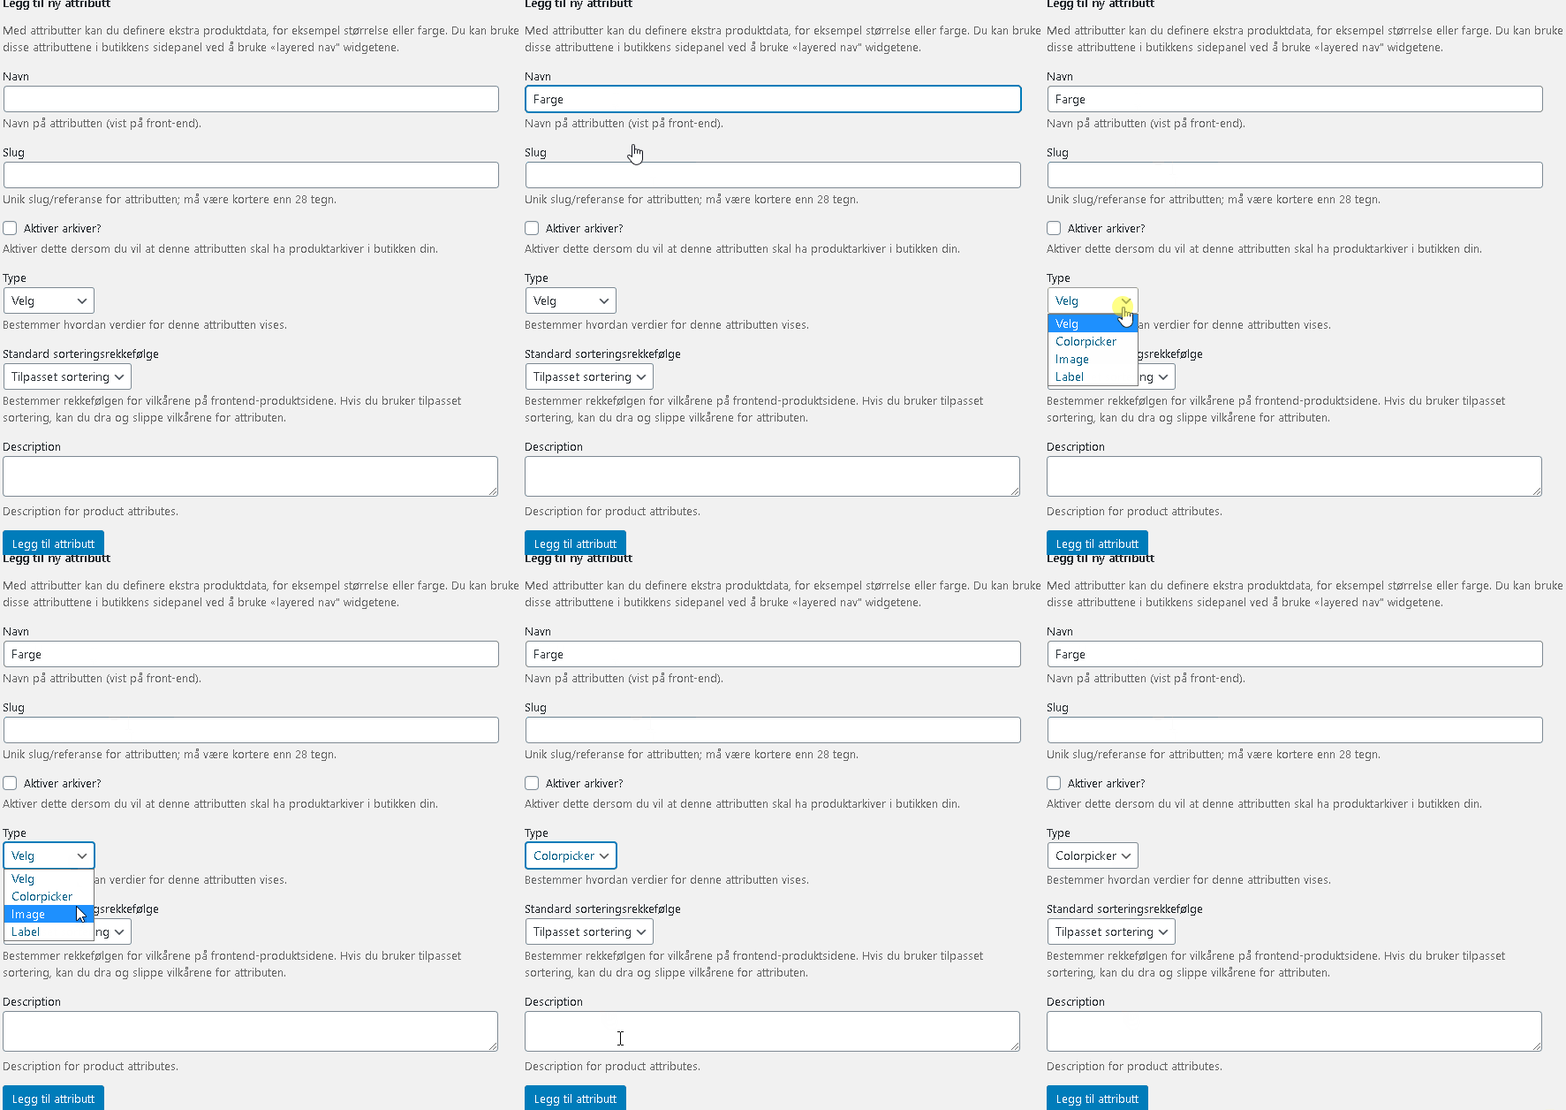
We now start by creating our first attribute, in our example we use “Colour” as it is the most used. You choose whether you want other names or values. On “Type” we select “Colorpicker” which gives you the opportunity to choose the display color for the customer. The colors are selected further down in the guide.

Now that the attribute has been created, it is time to enter colors or the values you want your customers to be able to choose on the products. Press “Configure terms” on the right side of the page on the same line as the attribute.

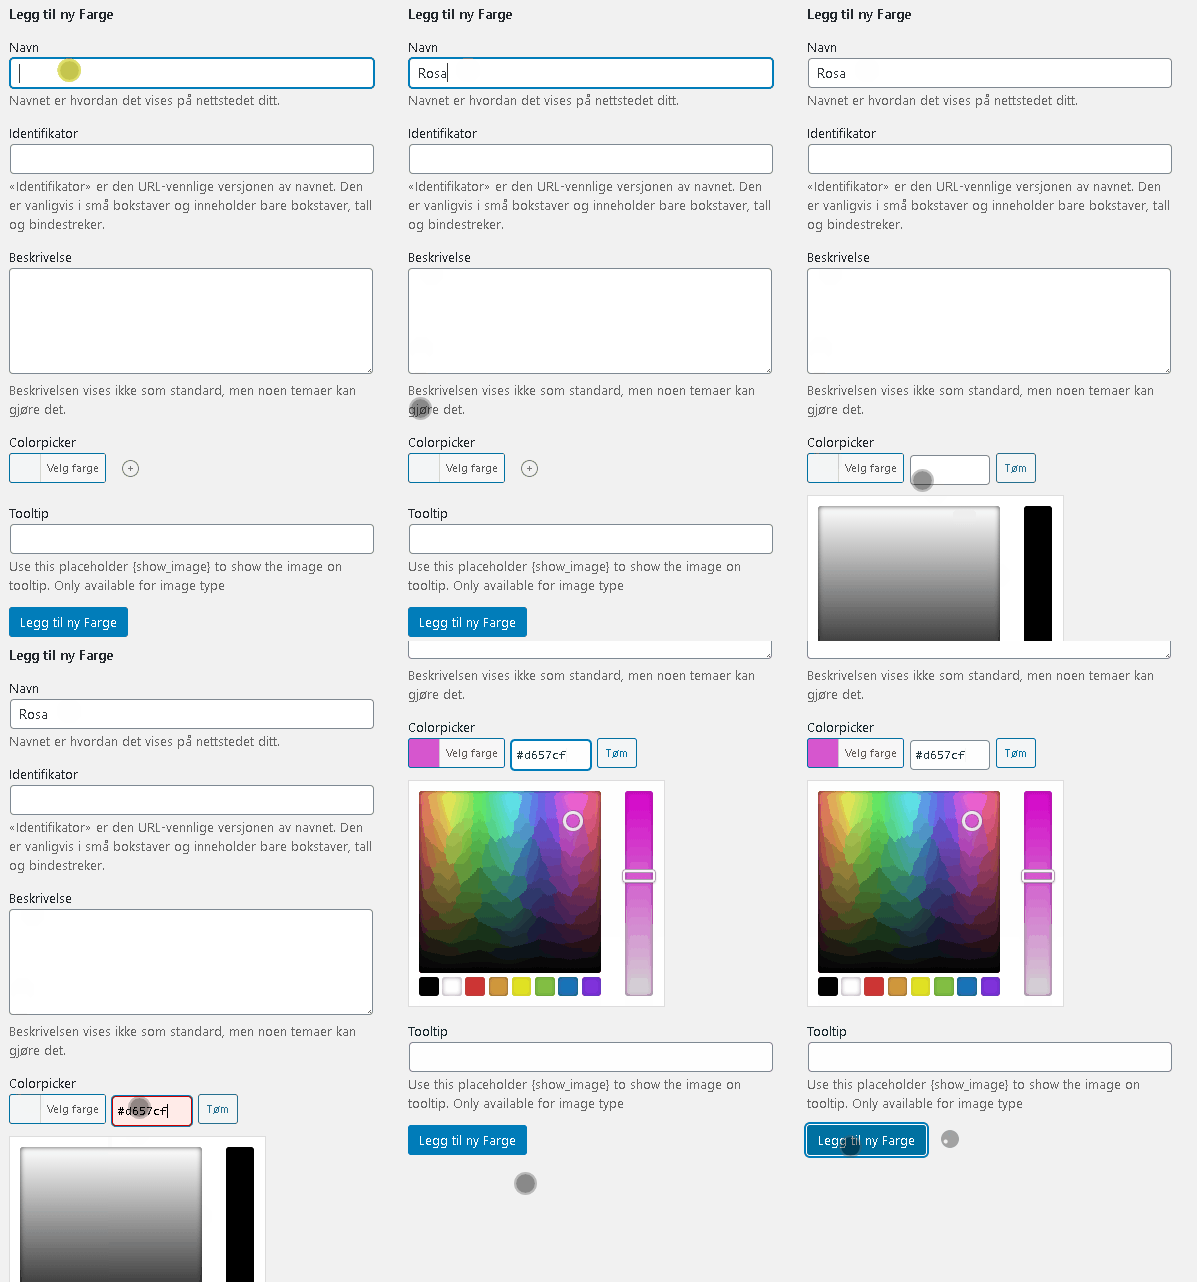
Now we add the first color, we take a quick one with “Pink” and choose a color we think fits the color of our products.

After the first color, we create another pair via “Configure conditions”.

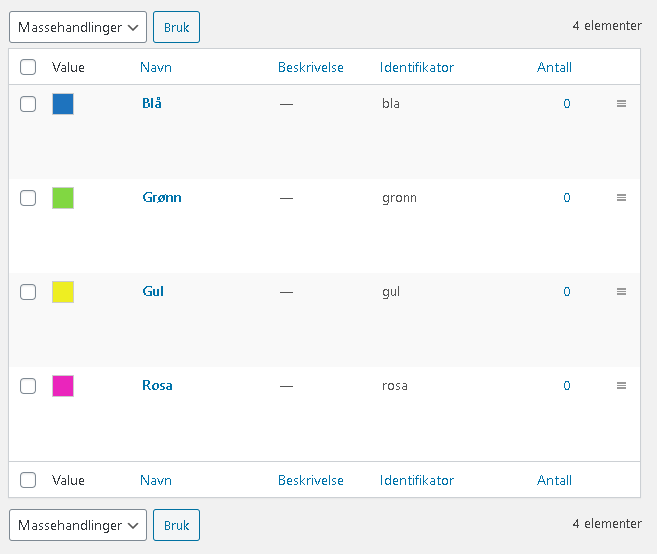
We say we are satisfied with 4 colors this time.

Now you have learned how to set up the actual colors in WooCommerce using the YITH WooCommerce Color and Label Variations extension.
Go to the next step to see how to create and change the variants.

Thank you for the exceptional effort you’ve put into curating such valuable content on this website. Your dedication and expertise are evident, and I’m truly grateful for your contributions. This platform has become an indispensable resource for me. Thank you for curating such an exceptional platform. Thank You! ID : CMT-TB9OSH35ETC86VZ279