In this guide, we show how you can add different variations to your products in WooCommerce using the YITH WooCommerce Color and Label Variations extension. To complete the guide as we have written it, we assume that this extension is installed and activated and that you have already created color attributes as shown in the previous guide .
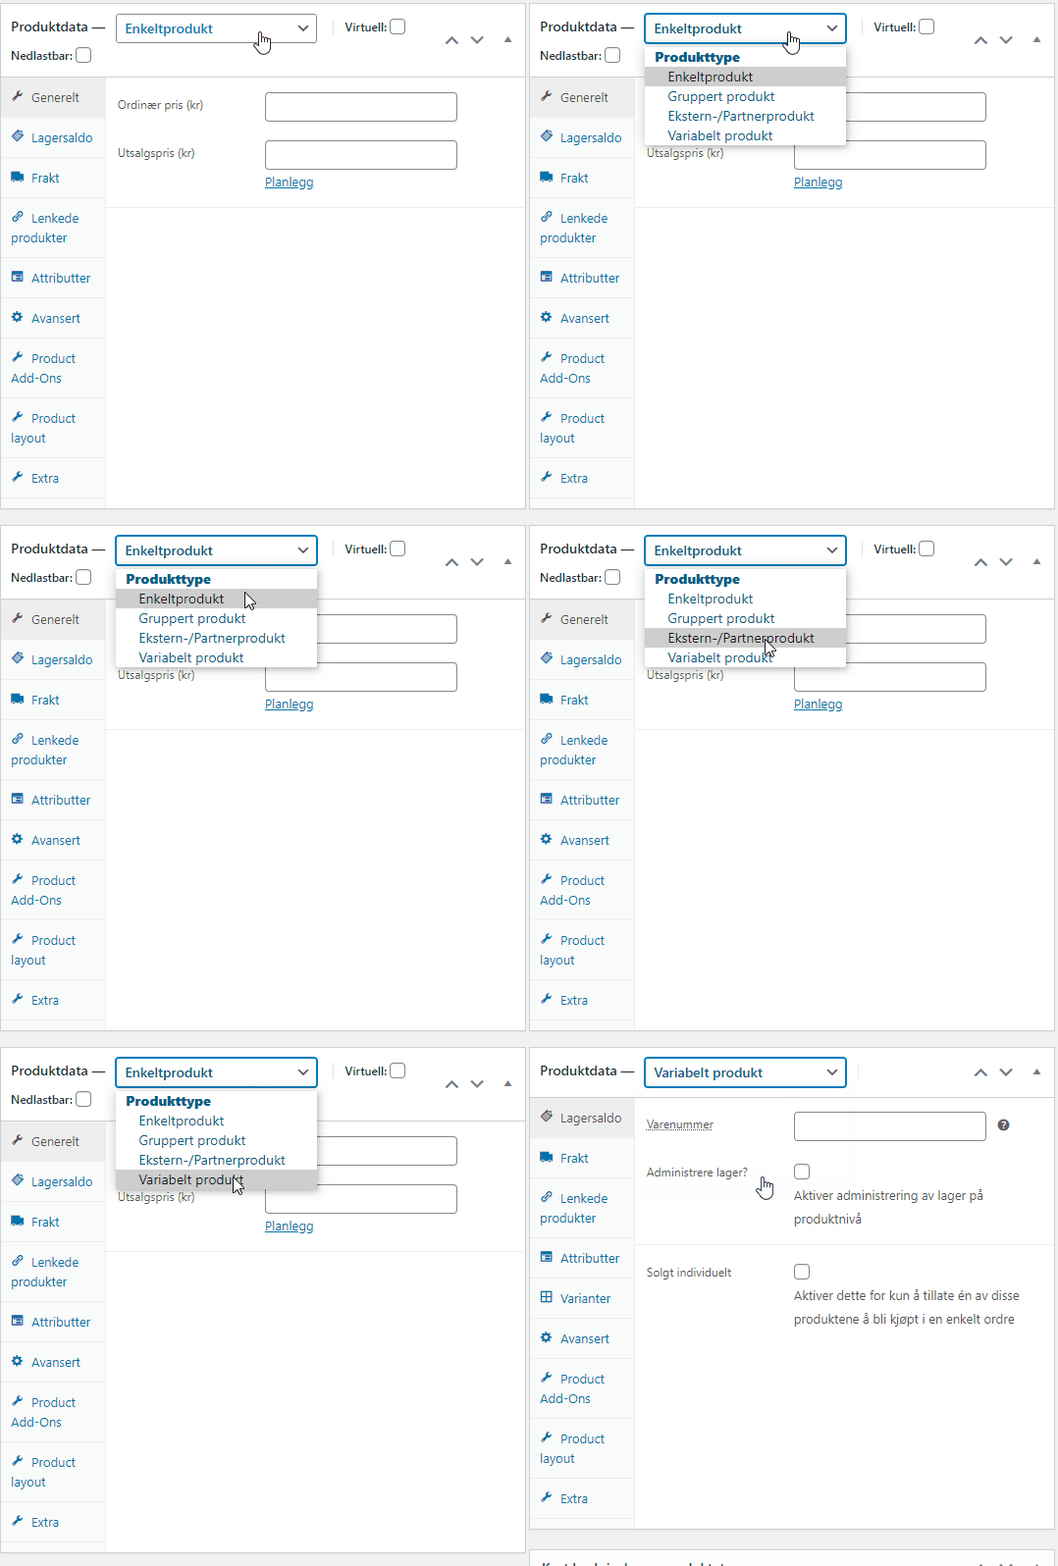
We start by opening the product we are going to change and change the product data from “Single product” to “Variable product” (this is the same whether you are creating a new product or changing an existing one)

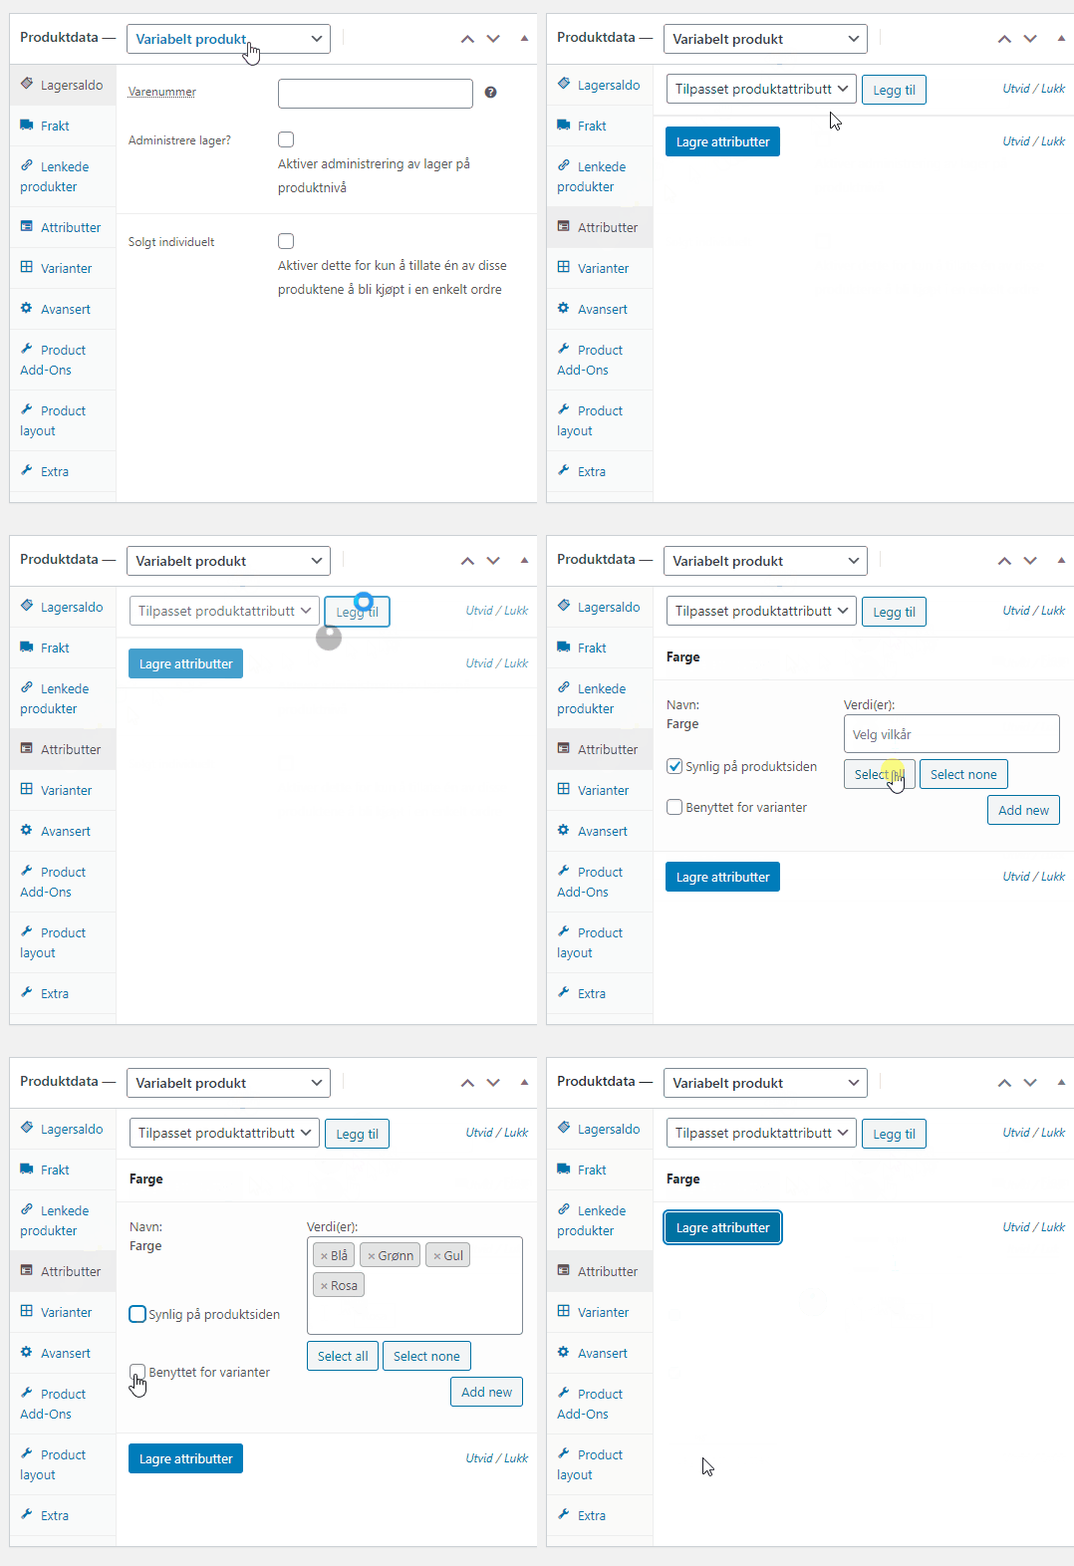
After we have set the product to variable, we press “Attributes” to retrieve the existing color choices we have already added. You can use the same color choices that you have already made in the previous guide. In the image below we select all, you can choose whether you want all or just individual colours. It is easy to remove or add them.
In the image, we also remove “Visible on the product page”, this choice defines nemling whether the colors should be displayed as text under “additional information” on the product, which we do not want in this case.

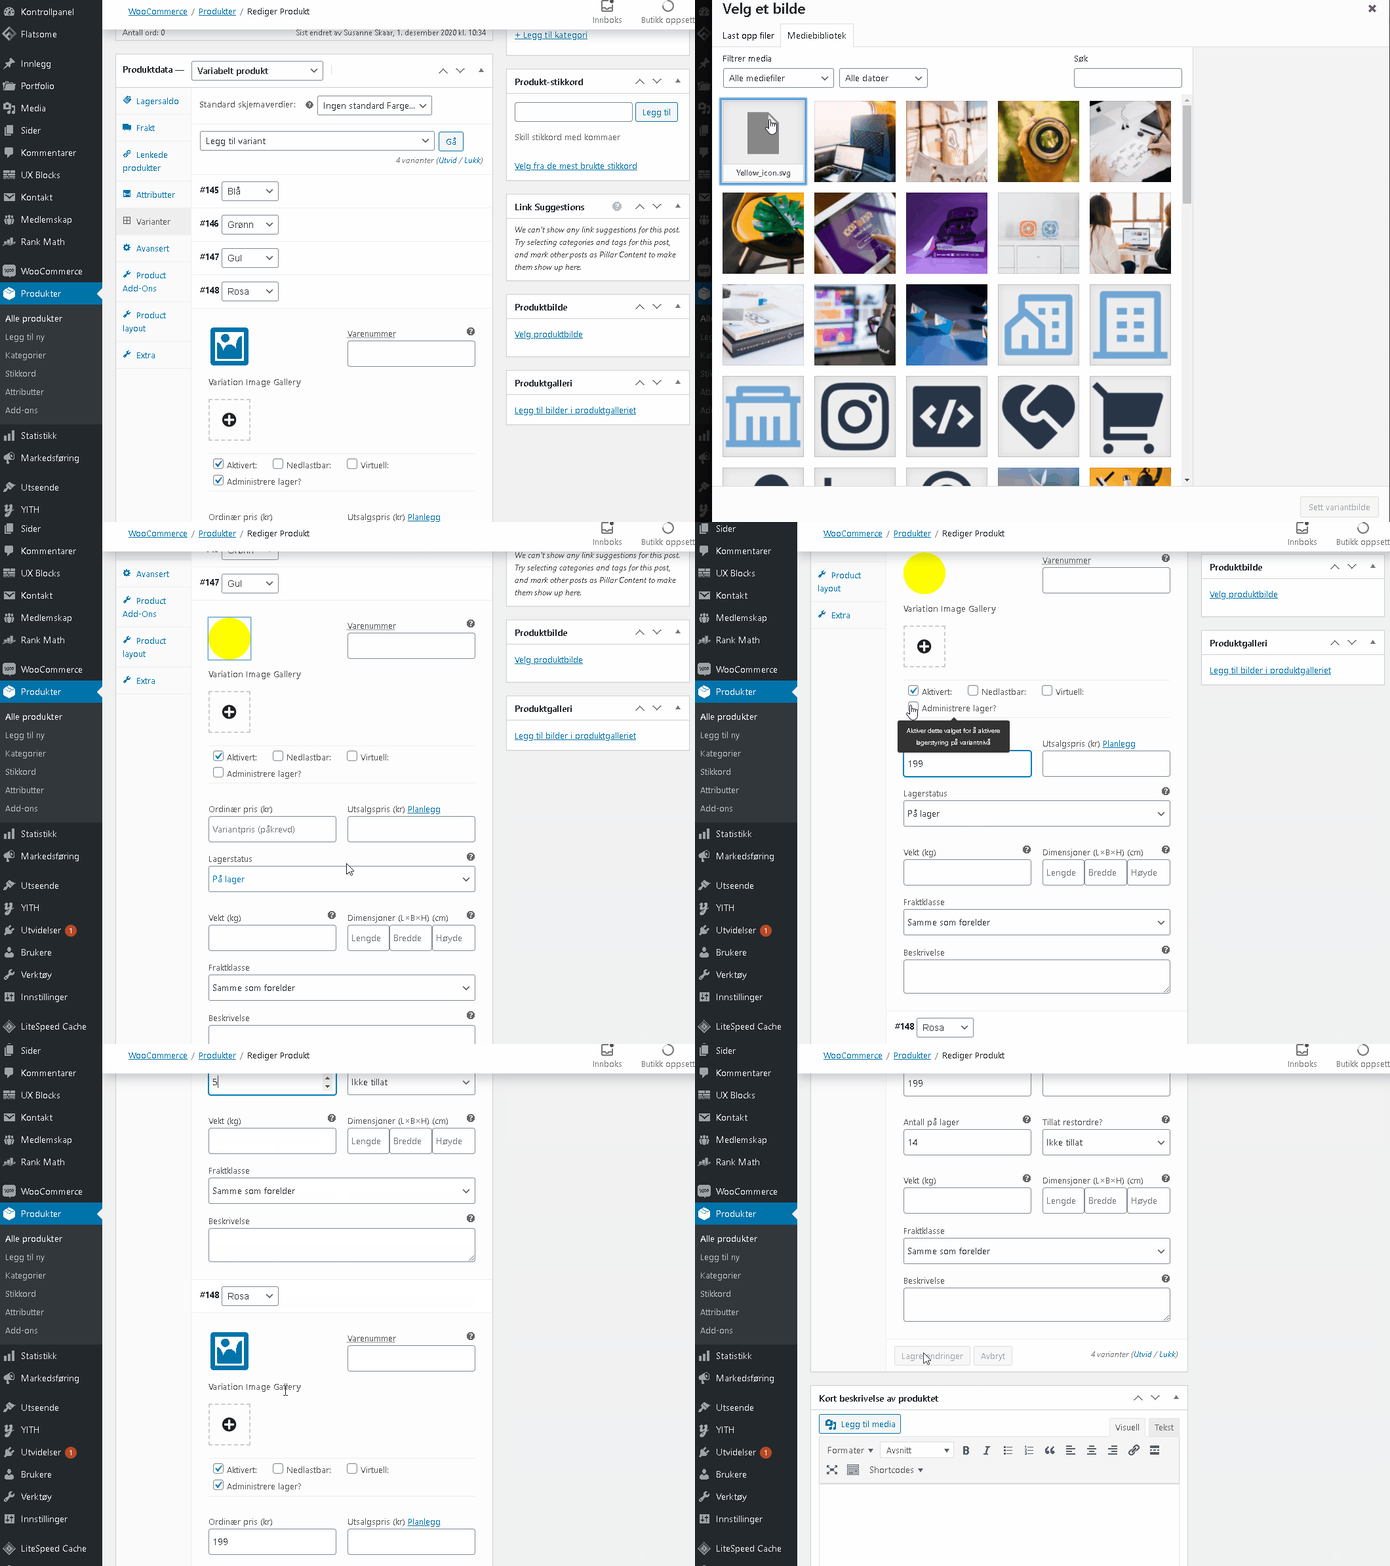
We now select “Variants” on the product data, here you should see that all the colors you added appear. You simply press the line containing the color you want to start changing (press the “empty field” to the right of the color)
We then press the icon of an image (above “Variation Image Gallery” to select a separate variant image.
A separate price is recommended per variant and we activate stock management for the variant so that we can be sure of how many there are of each colour.
Finish by selecting “Save changes” (and update/publish in the top right when we’re done)

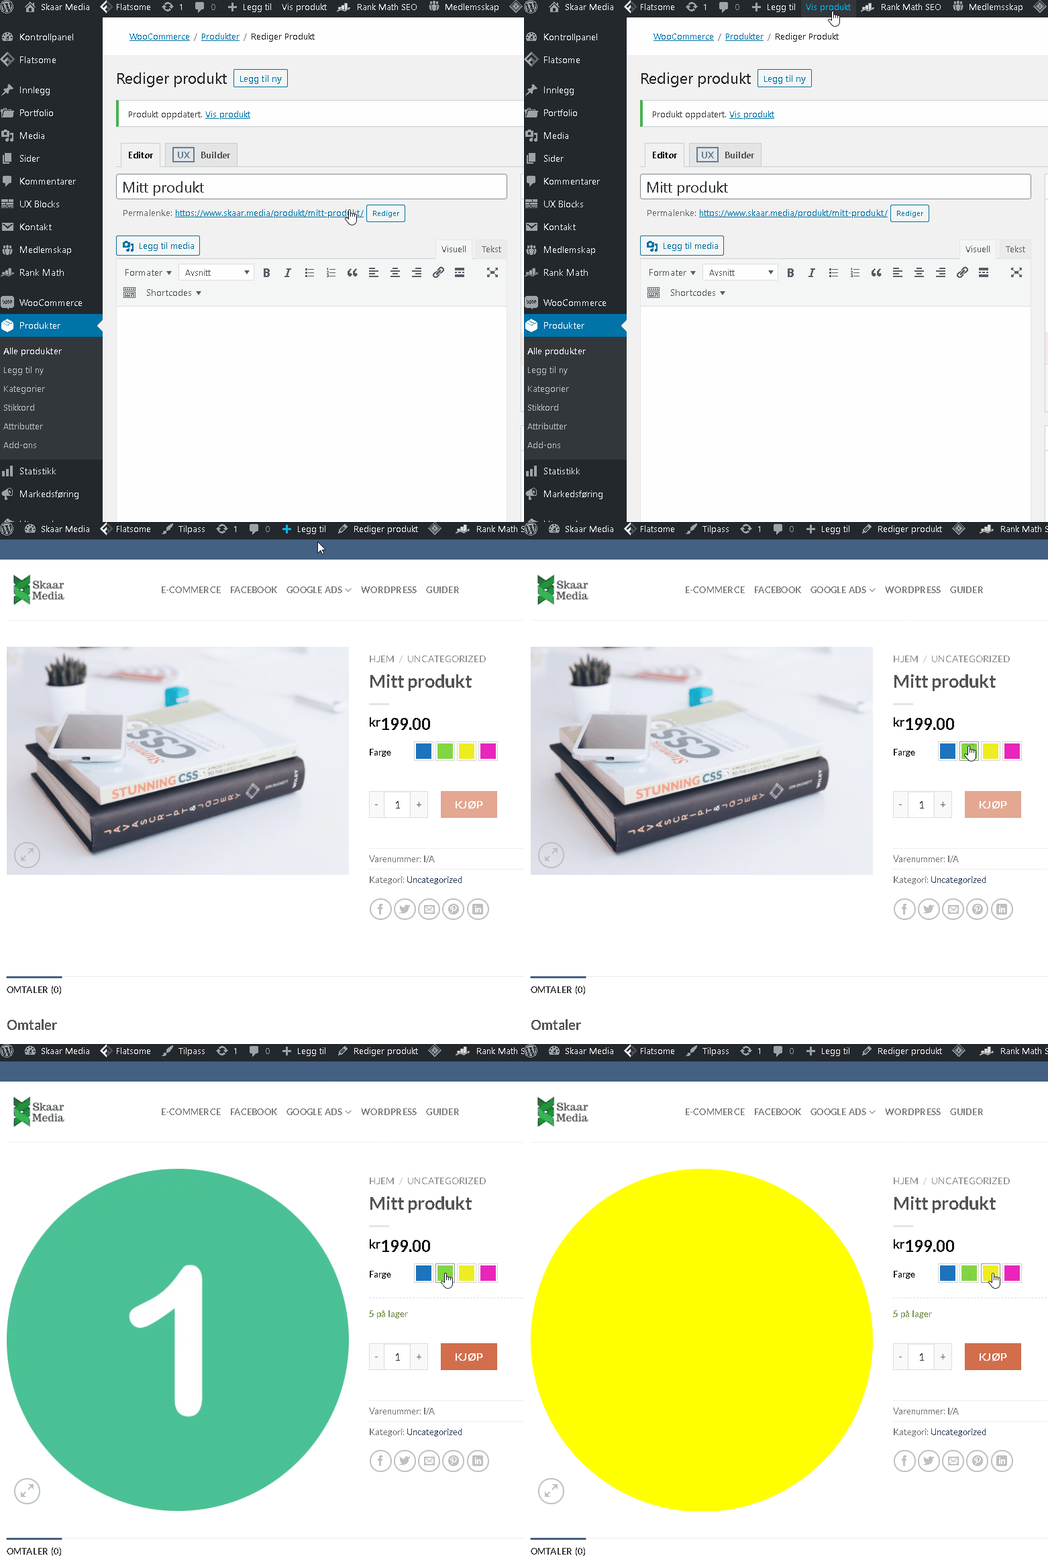
Now that we have stored the variants with inventory management and a separate variant image, we check that it shows as desired on the product page.

