In this guide, we show you how you can easily set up and connect to PayPal as a payment solution in your online store. This extension is easy to connect and does not require you to enter manual API keys.
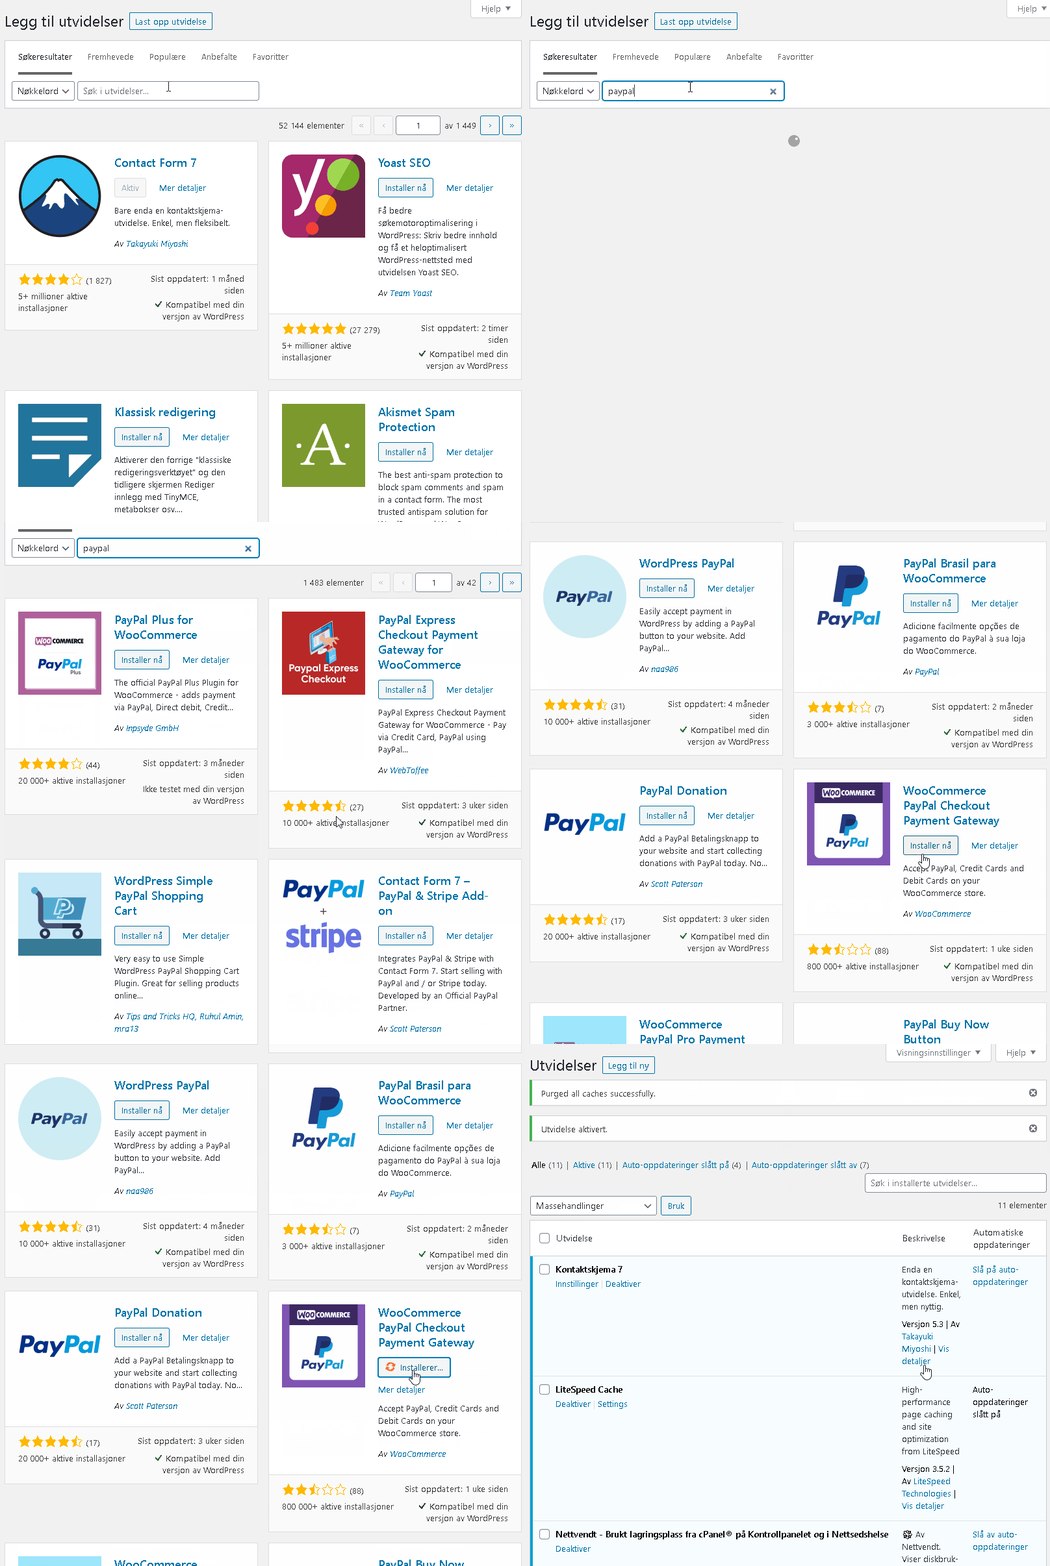
We start by adding adding a new a new extension under Extensions -> Add new and searching for “paypal”. Scroll down until you find the WooCommerce PayPal Checkout Payment Gateway from WooCommerce. Install and activate.

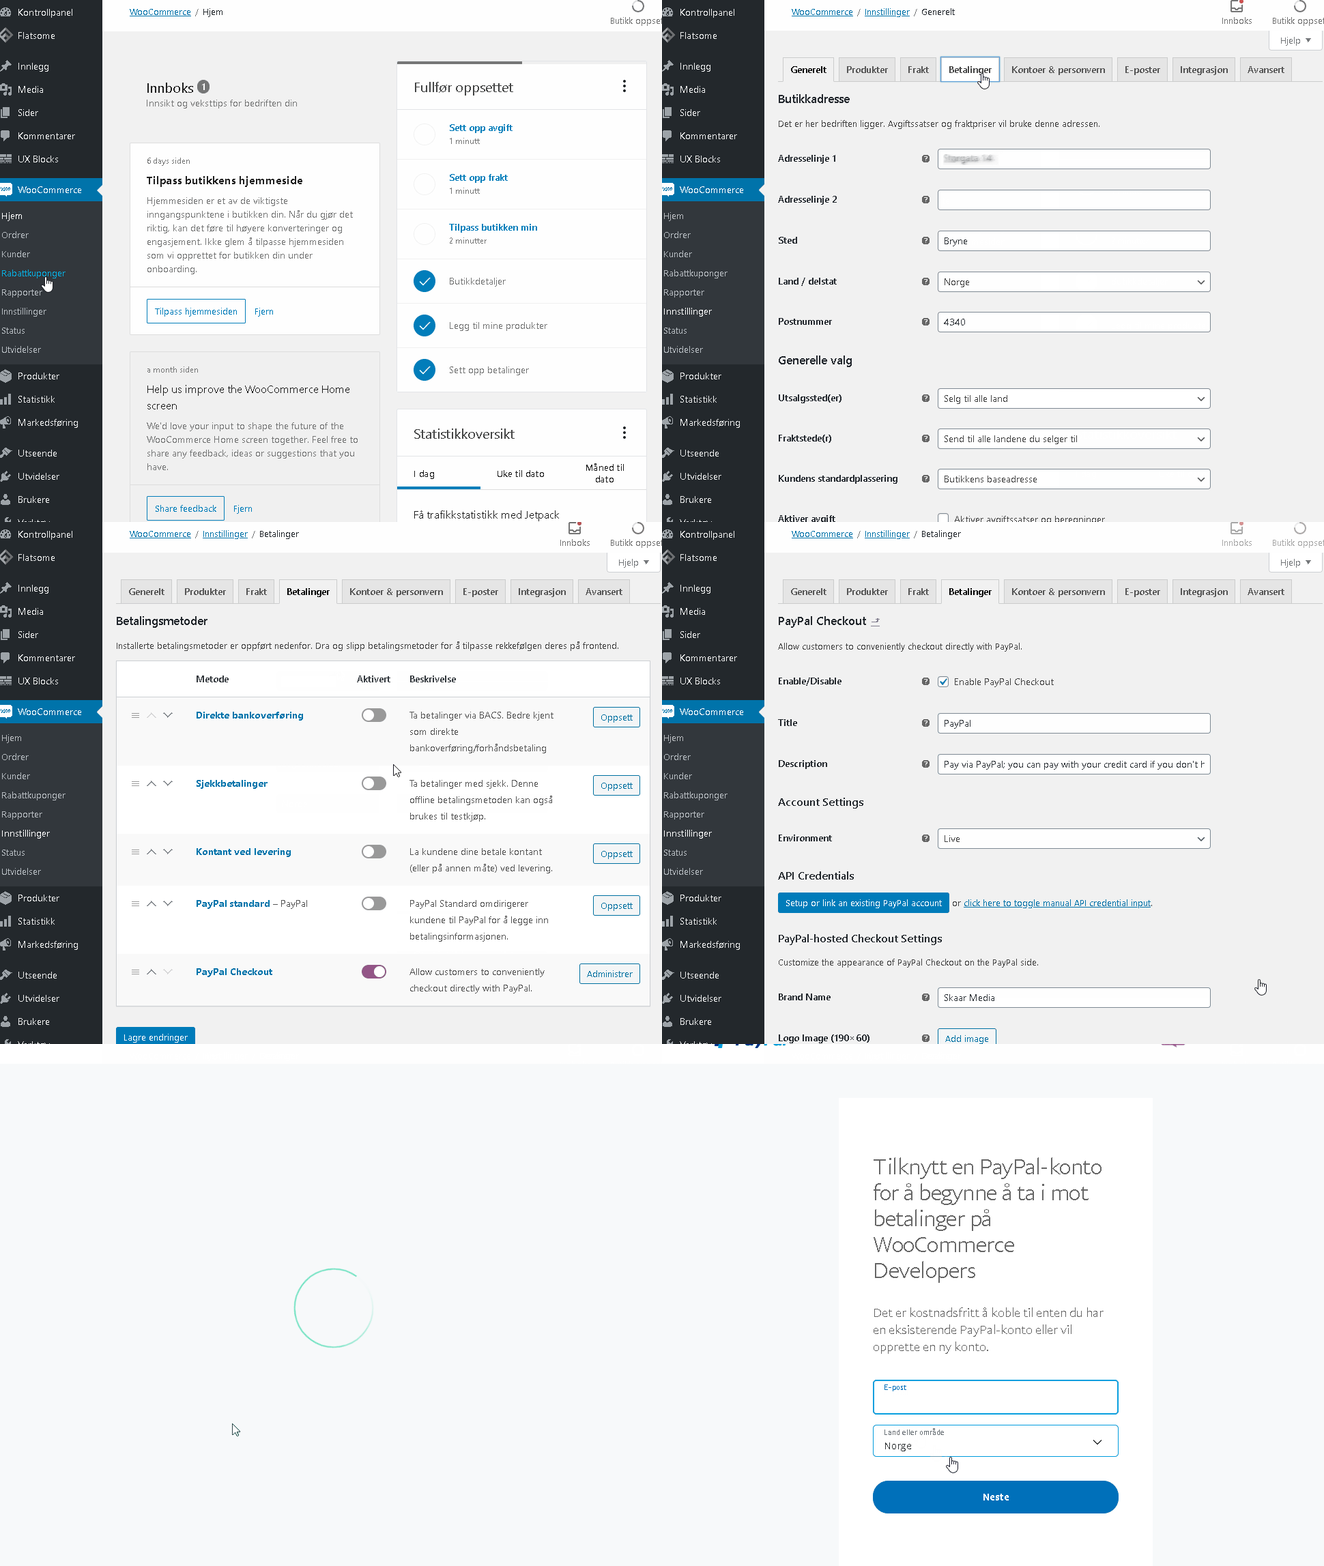
After installation and activation, we need to configure the solution. This is easy to do yourself, you first go to WooCommerce -> Settings and select the tab with the text “Payments”. Here you will now see “PayPal Checkout” (usually at the bottom if it is new). Click manage and then “Setup or link an existing account”. You will now be sent to PayPal’s pages to log in and confirm your account.

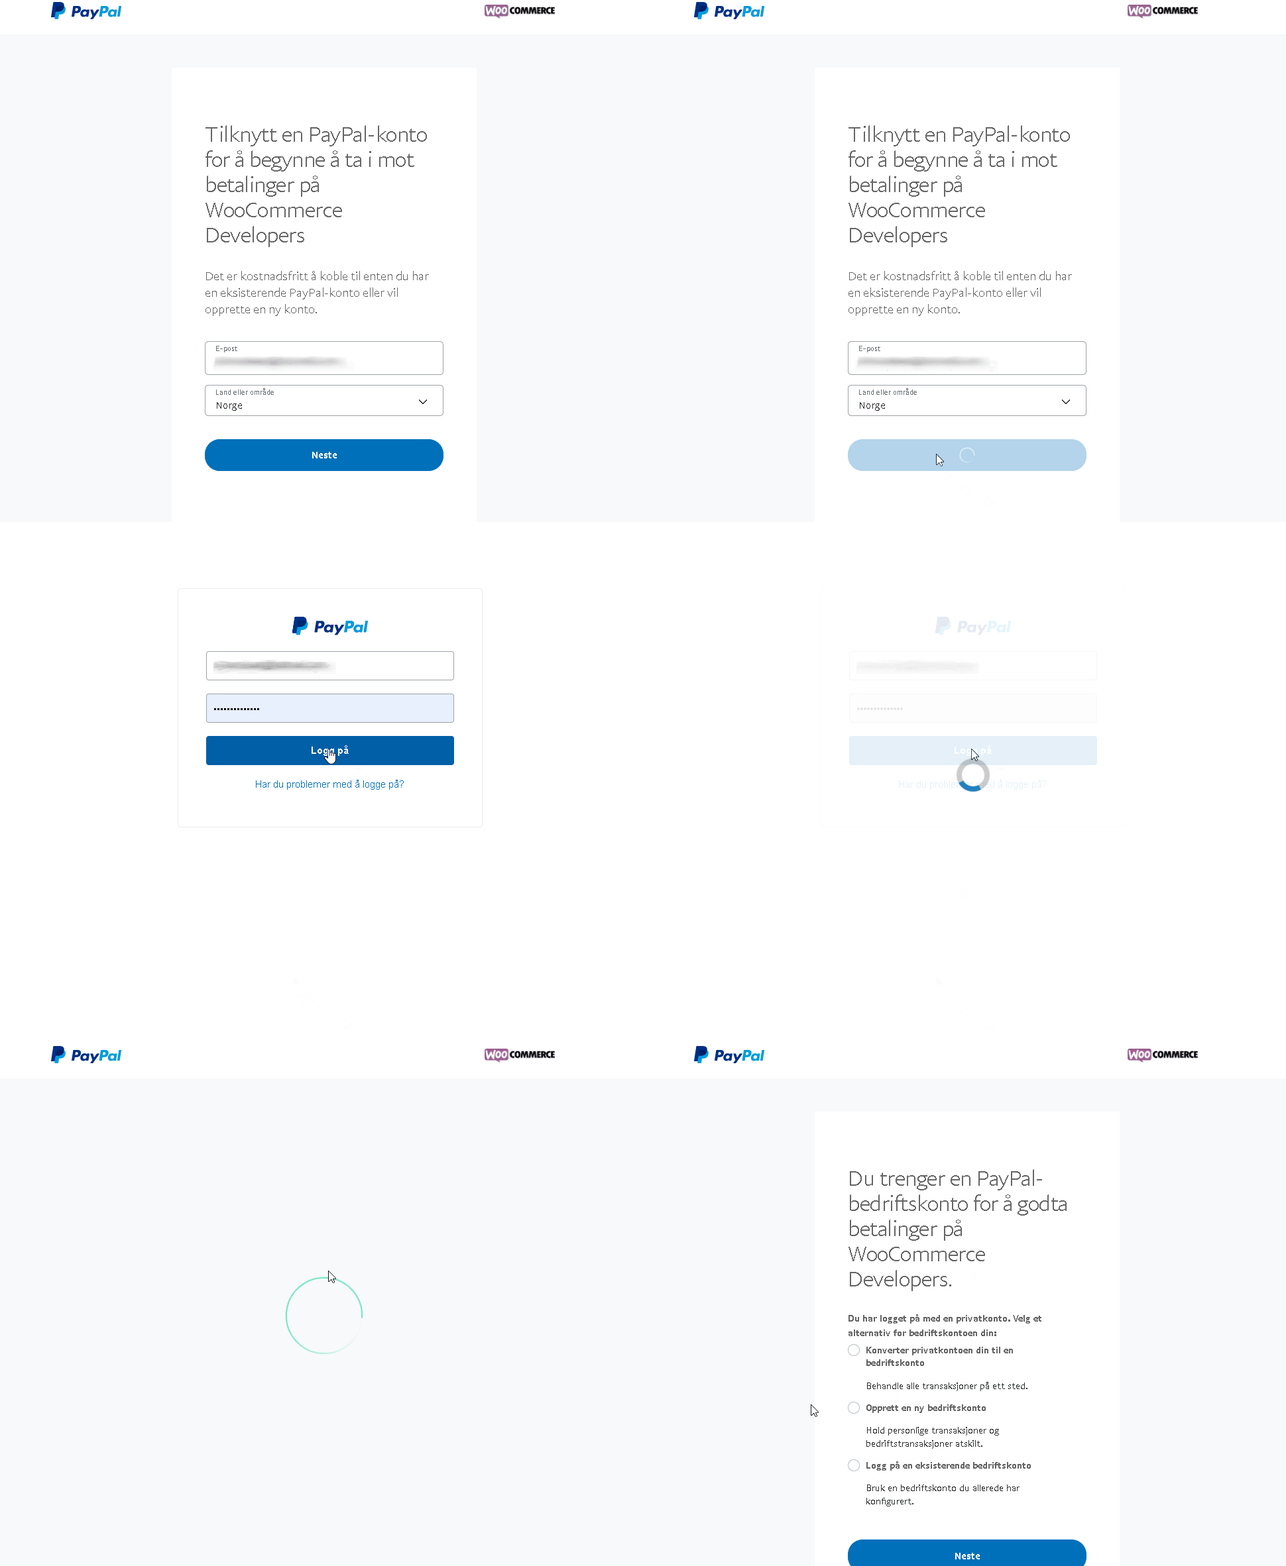
Note that if you do not already have a business account, you will be asked to convert, create a new one or use an existing one. If you log in to a business account, you will be asked to approve access.
The first example here is what happens when you log in with a private account:

Once you have connected, PayPal will be active and ready for use by your customers in your online store. The payments automatically go straight into your PayPal account.
