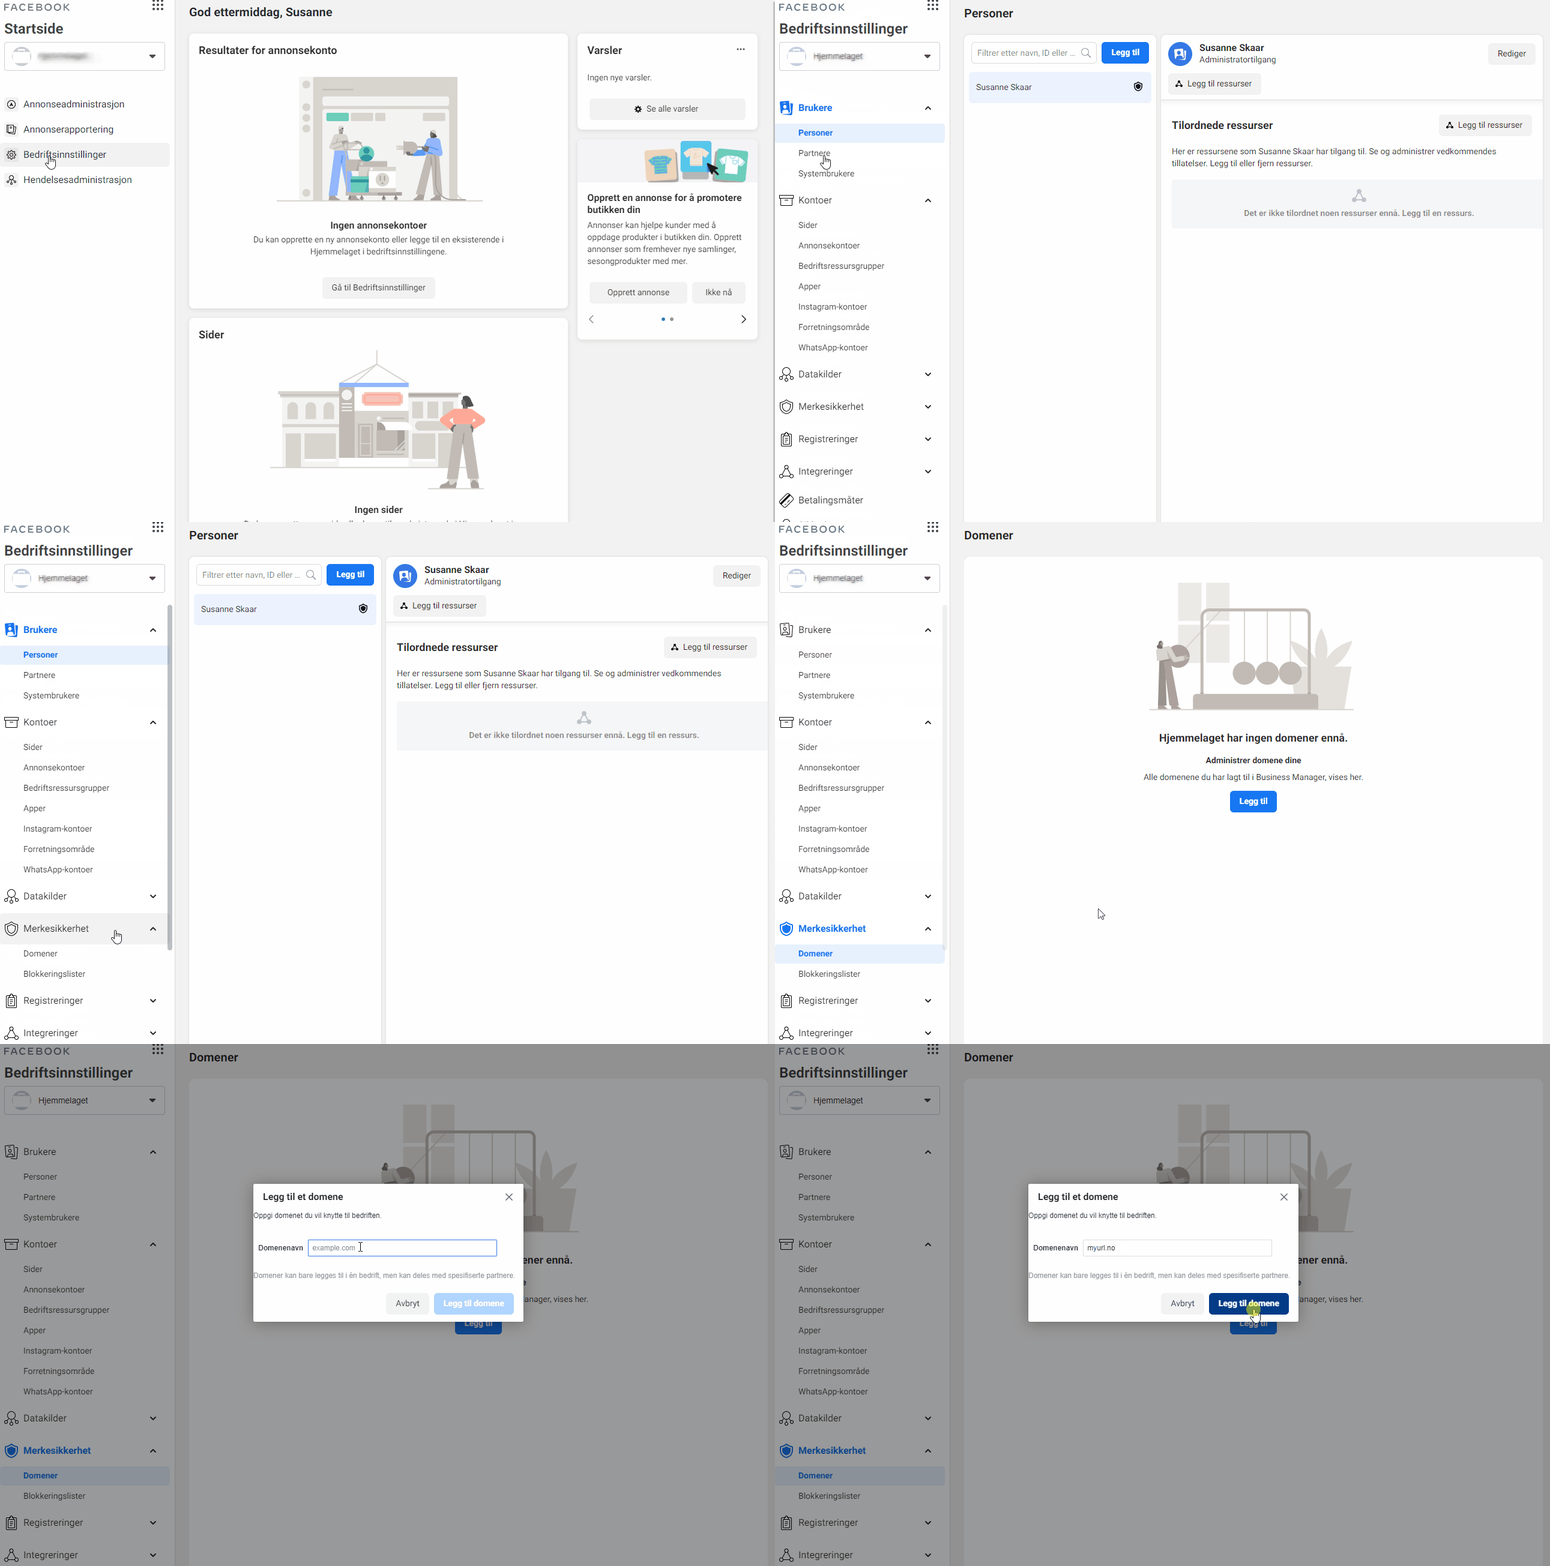
After the iOS changes, Facebook has increased requirements for verification of company and domain in order to be allowed to advertise, track and more. On this occasion, we see that many people have problems verifying the ownership of their domain. We have therefore created this guide to help you meet this requirement for advertising.
If you would like help verifying a domain, please contact us and we can do this for you quickly and reasonably.
Start by going to your Business Manager at Facebook. Then select the company in question, then you should see a website similar to the one we show in the picture below. Select Brand Security -> Domains -> Add:
Here you only enter your domain without www and http/https.

When you have now added the domain, you will be given several options to confirm that you are the owner of the domain.
We recommend using the DNS validation as it is always available via your domain.
DNS Validation
- Log in to the registrar where you have your domain (e.g. proisp.no )
- Go to the DNS administration for the domain (typically “Change DNS” or “Change zone file”)
- Add a new DNS record with only @ (or nothing) in the server field
- Select “TXT”
- In the content field, enter the TXT value you get from Business Manager
- Save and return to Business Manager and confirm the validation
The domain should now be validated!

With an approved verified domain, you can run better advertising on Facebook.